Published by Iulian Donici on 21.10.2020
and updated on 19.11.2020 at 21:47
Ventoy had its first release at the beginning of April 2020. Its support across the Windows and Linux environment is already astonishingly large. I’m currently testing version 1.0.0.06 and below, you’ll see how to use it on Windows and Linux.
Extract the .zip archive. Extracting Ventoy archive on Windows 10
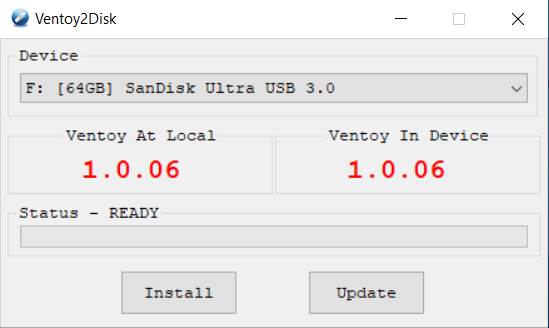
Run Ventoy2Disk.exe (it will ask to Run as an Administrator). Ventoy, extracted archive on Windows 10 Once you’ve launched Ventoy, you will need to install it in your flash drive (it will take just a few seconds while it formats your flash drive and creates its own partitions).
Copy your ISOs into your USB drive. ISOs copied into the freshly formatted flash drive using Ventoy, in Windows 10
Boot your PC from the USB drive. Ventoy booting menu
Linux
Download Ventoy from the official website with wget inside your terminal. So, you’ll need to:
Get the direct link from the website by running your web browser and going to the Ventoy download page.
There, right-click the Ventoy Linux version and just copy link address.
Find out what’s your flash drive’s full path. For example, it could be located at /dev/sdb/. You can do this by displaying all of your hardware information and search for your your flash drive’s name and its fulll path (again, you need to look for a device that looks like /dev/sdb or /dev/sdc).
Once you’ve got the full path of your flash drive, in your terminal type:
sudo sh Ventoy.sh -i /dev/sdb
Now that Ventoy has been installed, all you need to do is copy your favourite ISOs straight into your flash drive.
Restart your PC and make sure you’ve set your BIOS to boot first from your flash drive.